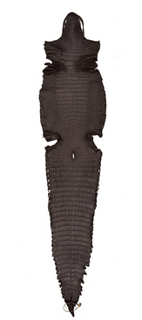
Tanning your alligator skin properly is essential to creating the finished product that is luxurious, elegant and durable for the long haul. The process actually transforms the raw alligator hide into leather which prevents it from deterioriating.
Preparing the skin should start immediately once the animal is harvested and should be done away from direct sunlight. To keep the skin in its best condition, try to avoid blood, meat or fat or sharp objects from touching the skin’s surface as that makes it easier for bacteria to seep into the skin.
Skinning
 Skinning is one trade that requires a set routine that develops with enough experience. Keeping this routine is key to ensuring consistent, quality work. It begins with outlining the gator or croc. On the animal’s sides, the cuts should be between the first and second row of bones from the edge. Cut the back towards the top of the biggest scales of each of the four legs and completely around the ankles.
On the tail, cut along outer most edge. Begin skinning the body from the front legs and close to the side skin. Patiently, skin the the front legs and don’t be afraid to pull. Then, do the same with the back legs. At this point, you should just have the belly remaining.
Locate the gator's jaw and outline where you’ll do your cutting. You can make the skin more tight by pulling on the jaw muscle. Continue to cut the skin of the jaw and towards the neck as well. Now, you’re at the belly where you can pull and cut until your task is accomplished. Again, remove any excess fat or meat. Wash the skin in fresh water.
Fleshing
Fleshing is done by scraping the skin’s flesh side with a blunt object like a paint scraper. Some more developed and experienced facilities use pressure washers at 1,000-1,500 PSI, depending on the size of the skin. If you use a pressure washer, it’s crucial to keep your angle in mind. For instance, shooting down at the skin if it’s laying on the ground can have some negative effects to the skin and isn’t recommended. Rather than a straight on angle to flesh, a 15 degree angle is more ideal and will protect the product more. Once finished with the fleshing, allow it to drain before it is salted.
Salting
Once fleshing is complete, you should allow it to drain and then begin the salting process. This entails coating the complete skin with about 1/8 inch of salt — rubbing it in every crease and crevice. Fold in the appendages, roll up the skin and store it in a dark area for a couple of days.
This time allows the skin to truly absorb the salt. Moisture will begin to fall out of the skin. After this period, shake the salt out and then re-apply it, if it’s next destination is storage.
For more information on this topic or other exotic skin inquiries, please feel free to contact Panam Leathers today.


