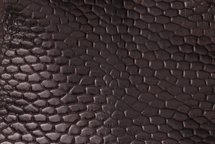
 A lot of the fashion designers are curious about the tanning process for various exotic leathers. In fact, questions like “how do you tan ______?” are among the top few FAQs that Pan American Leathers gets.
So, in this blog article, we thought we’d share a little bit about the tanning process for one of our newest products: beaver tails!
Tanning beaver tails is a 10-step process from start to finish. Here are the “broad strokes” of the process.
Step 1: Splitting the Tails
When the beaver tails first arrive, they have both a top and a bottom skin. Each tail is split into these top and bottom halves.
Step 2: Removing the Flesh
The excess flesh on the back of each side of the tail is carefully scraped away. This is to make sure the leather isn’t too thick and to make sure the tanning process penetrates the skin fully.
Step 3: Soaking the Tails to Clean Them
The tails are further processed by soaking them in a cleaning solution to remove any dirt, preservatives or other contaminants that could be transferred to the tanning drumslater.
Step 4: Removing the Hair
Hair on the beaver tails is chemically removed. Skins may be cleaned again before the next step to rinse off stray hairs.
Step 5: Tanning
The clean tails are chrome-tanned to convert organic material (animal skin) that can decompose into an inorganic material (leather) that won't. When the skins come out of the drum, they will be pliable, but quickly harden to become rigid.
Step 6: Shaving the Skins Further
After removing the skins from the drum, they will be shaved down a bit to make them thinner, more pliable and more pliable, also allowing the dyes used to color the skins in the future to penetrate better.
Step 7: Re-Tanning the Skins with Vegetable Products
After thinning the skins down to make them softer, they will be put retanned with vegetable-based extracts, commonly referred to as "veg-tanned". This will help to soften the beaver tails, making them easier to work with later.
Step 8: Coloring the Hides
The beaver tails will be removed from the veg-tan solution and placed in coloring drums. We stock dozens of colors but can also make custom colors to order.
Step 9: Shaving the Tails Again
After coloring, the tails may be shaved yet again to clean up the backsides and/or even out the thickness now that the hide is pliable. This can also be done in a properly configured splitting machine.
Step 10: Finishing the Hide
A finish will be applied to the hide to achieve a specific look. Common finish options (and the ones we keep in stock) for beaver tail hides include:
- Glaze Finish. This finish gives the hide a glossy, smooth surface.
- Matte Finish. This finish minimizes the reflection of light and has a rougher feel.
But we can also make any of our specialty finishes for custom orders of beaver tails (e.g., crisp, vintage, metallic, etc.) Some of these steps require a certain amount of extra setup and time before they can begin. This is why custom beaver tail skin orders have a surcharge attached to them for setting up the different formulations and procedures needed to process the skins—as well as why it can take a while for a custom order to be completed. If you’re making a custom order for beaver tails, larger orders will tend to have a lower cost-per-skin than smaller orders because the same set up work is required for both large and small orders.
Want to know more about beaver tail skins, or place a custom order? Then contact Pan American Leathers today to learn more about these exotic skins!


